Here we go- On the back of the pattern we are given fabric requirement for three different sizes. You choose what size strips you want to work with. For this quilt I am going to use 2 1/2" strips. I am also going to go scrappy.
Things to remember- this is based on a fat quarter (18 x22) Width of Fabric strip will be 22"
I had my class write down what 'colors' they were going to work with. Then they found the # of fats needed. Everyone was encouraged to shop from their stash. Several have decided to use yardage and just three prints and a background.
One of the things I LOVE about class quilts is each is so different. If you choose to use yardage, figure out which size strips you want and purchase accordingly.
I have the GO (and BABY) die cutters and strip dies for 1 1/2, 2" and 2 1/2. Of the 9 quilters present tonight 4 of us have our strips cut, the other gals were waiting to see this step before getting their fabric.
On page 3 of the booklet the strip sets are explained. For our Home Work this session we are going to sew strip sets. Students are encouraged to make a system for keeping their sets organized.
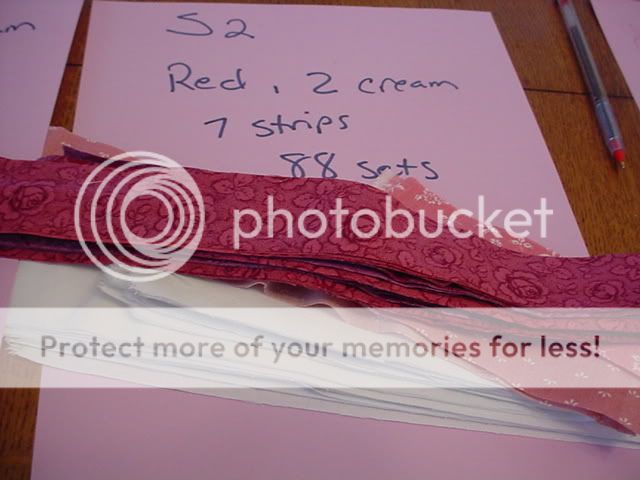
I prefer to used a piece of copy paper for each group S1 through S11. I label the page as follows:
S1. (color- hers was Blue, mine will be Purple), next is Two (2) background- hers were cream, mine will be also, then you need to figure your number of groups by what size strip you are using. In my case my first page would be: S1 Purple, Cream, Cream (11sets) 88 sub-cuts For our group class the gals are encouraged to get their 3row (strip sets) sewn and we will sub-cut next meeting.
I have found that having a separate piece of paper labeled for each strip set (3row) helps. I first deal my colors out to get random in each page. For example on S1 I need 11 groups with purple, cream, cream so I will use many different purples to get my 88 3rows (sub-cuts)
 | ||
| You can't tell from from this photo but here I used 1 1/2" strips and needed 7 different reds to get my sets. |
I found it helpful to use a card table to keep myself organized, I found that after I dealt out the strips, I could just pick up and sew sets when I had time.
Then when I had all the sets for one page done I could iron and sub-cut.
Working on this in different phases helped keep me from getting board. I also found it moved pretty quickly b/c I wanted to see each page go from strips to sets and then to sub-cuts.
Read your direction pages at the front of your booklet and get use to the terms. Keys to remember are make a chart of what colors you are using so you don't get confused. Find a way to organize your strip sets and/or sub-cuts so you can pick up where you leave off.
On Page 3 items S12-S16 only need a few of each, you really can do these with the left overs from S1-S15. I would suggest that you do NOT make these the same. (It is tempting to just use the same material for each BUT it will look better if you scrappy even these few sets up.)
Our group is meeting 2nd and 4th Tuesdays, next time we get together we will sub cut and work on stage 2.
I hope to have pictures to share of our progress. (I apologize I forgot my camera tonight)
Pick your fabrics, (I hope you can bust some stash!!) Cut your strips, Sew your sets (S)
Next time we will sub-cut our 3rows and start our 9 patch-units.
Leave a link to your blog post on Celtic Knot in your comments. I will figure out how we can play along together, I am looking forward to see many beautiful future heirloom quilts.

5 comments:
NICE POST!!! great job cheryl. i did absolutely NOTHING productive today except get my fabrics, so i guess i am a bit ahead of the game LOL
love your ideas for the organization, i think i will use the dining room table and papers for the initial layout and then get them into zip locks so that i can free up the table since i have bajillions of kids running thru all the time.....
cutting commences tomorrow!
baggies are a good idea also. i found the papers worked for me b/c I could pick up a couple and sit by the machine and sew, then lay then back down. I could rotate between what needed done. I was afraid if i used baggies they would get buried and I would 'forget' to dig them out. Can't wait to see what everyone chooses to do.
Great post. Lots of good ideas. I am using zip lock bags for each subset. It is just easier that way for me. A suggestion to have everyone following to participate in this blog...give those who are signed up permission to post on this blog. That way we can see everyone's progress in one place. I did this on another online quilt along and it worked well. Just a suggestion.
My intention was to allow everyone to add their own progress posts, just haven't figured out how to invite you to do that. Madame Samm said I could figure it out, I just haven't put my brain to it.
YES I want everyone to post or at least link.
I am linked in...thanks Cheryl, I am looking forward to this and I REALLY need to get this wedding quilt done, so I need all of the incentive to get through this.
Post a Comment